With most of the world in self-isolation, the World Health Organization has recommended playing video games as a healthy pastime, and many are pulling out their classic consoles. Here’s how to make sure those controllers are in tip-top shape.
With shelter-in-place orders and the shutdown of many nonessential businesses, WHO ambassador for global strategy Ray Chambers tweeted the social media campaign Play Apart Together to emphasize the importance of video games in flattening the coronavirus infection curve.
Lifehacker.com writer Whitson Gordon said controller buttons can wear out over time. With step-by-step guidelines, Gordon explained the process of disassembly, cleaning and reassembly of game controllers is an easy, at-home process.
Before starting, tech reporters recommend checking to make sure any controller is out of warranty. According to Consumer Reports Magazine, warranties usually last two to three years if an extended warranty is purchased.
The next is to make sure the necessary tools are at hand. Most controllers can be disassembled and cleaned with a few simple items: a screwdriver, rubbing alcohol, cotton swabs, dish soap, water and a brush. Supplies may vary slightly depending on the controller or tutorial.
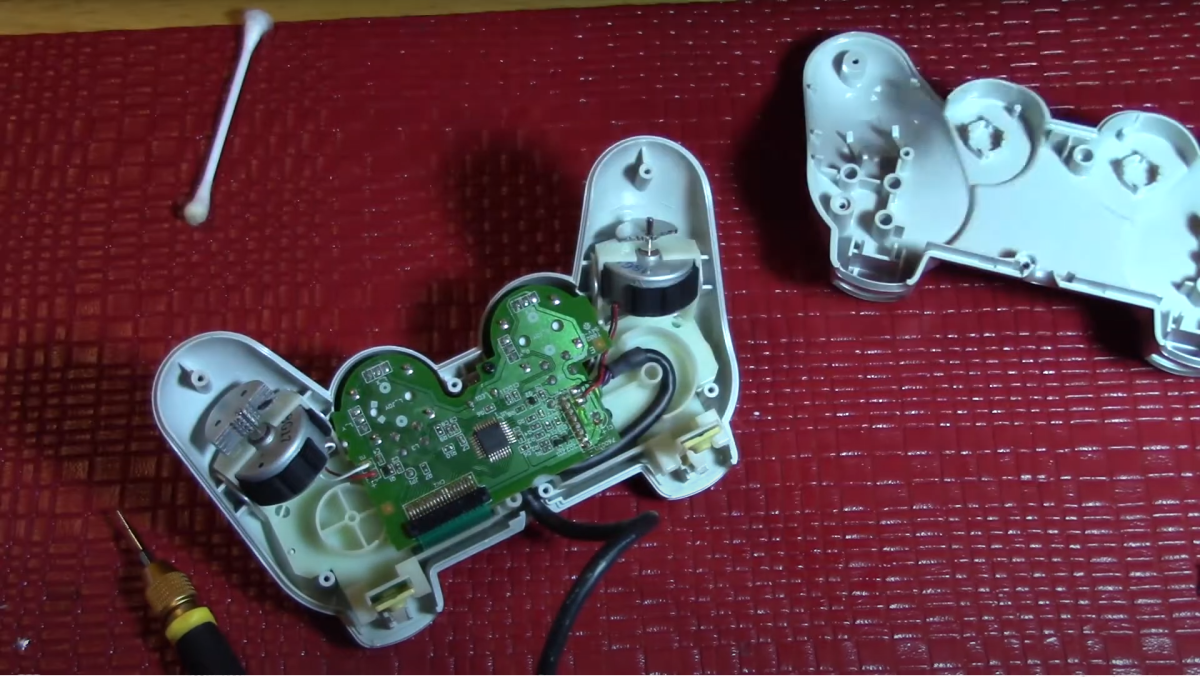
The video game repair channel Retro Repairs on YouTube is hosted by Adam, who said the first step is removing all screws on the back of the controller. He noted some controllers may have a screw that is hidden by a sticker. To reuse the sticker after cleaning, take care removing it, said Adam.
With all screws removed, the two halves should separate relatively easily, Adam said. The next step is to remove the circuit board and buttons. Once all components have been separated, actual cleaning can get underway.
Adam recommends all plastics be washed in hot, soapy water with a good scrub.
The next step is to clean the circuit board. Adam notes the main concern at this step is the silicone pads underneath the buttons on the circuit board. This is where the buttons make the connection and send the signal to the console. Any buildup on the button pads and silicone membrane should be cleaned, Adam said, using alcohol and cotton swabs.
Elliot Coll, who runs The Retro Future YouTube channel, said the silicone pads can also be cleaned with paper to fix any sensitivity problems with the buttons.
Once all components are clean and thoroughly dried, all that’s left to do is to reassemble everything to the way it was.
Tutorials for specific controllers can be found at lifehacker.com and on YouTube at RetroRepairs.
Upgrade your gaming with clean controllers
May 11, 2020
Photo by Provided
Adam from the YouTube channel Retro Repairs said cleaning the circuit boards of a video game controller is an easy task.
0
Donate to The Battalion
$2065
$5000
Contributed
Our Goal
Your donation will support the student journalists of Texas A&M University - College Station. Your contribution will allow us to purchase equipment and cover our annual website hosting costs, in addition to paying freelance staffers for their work, travel costs for coverage and more!


